Agent Installation
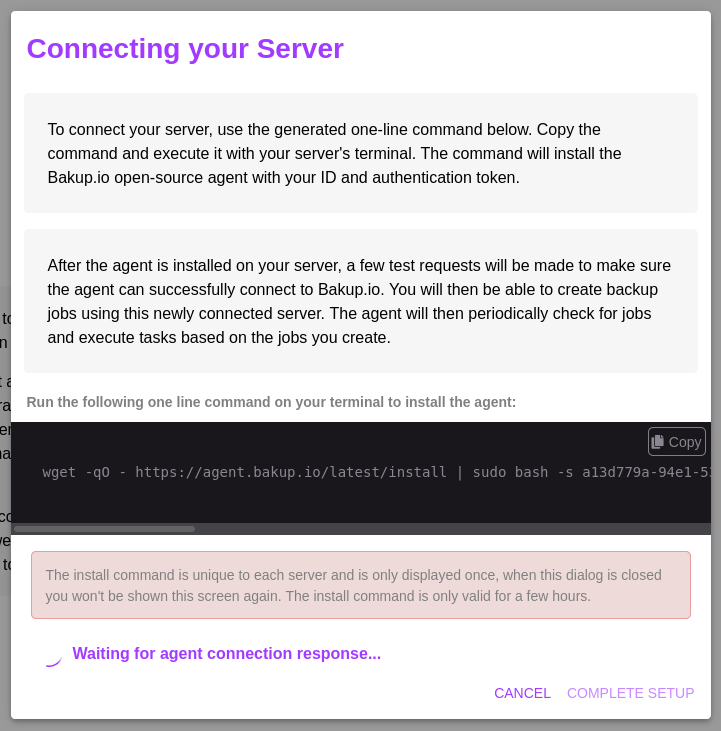
This section details how the agent can be installed on a server. The main method is to use Bakup.io's settings page to add a server, and you will be given a one line command that will download and configure the agent automatically.
Automatic Installation#
Generate an installation command by creating a new server on bakup.io
The installation must be executed as root, a service user called
bakupagentis created for the agent to use and run under, or specify the ID of the user that you would like it to run as on the end of the installation commandinfo
Whilst the installation script must be executed as root, the script will complete installation and then the agent will use the
bakupagentuser that is created. If you would like the agent to run as a different user, you can specify the user ID on the end of the installation command. Thebakupagentservice user does not get a home directory generated by default but you may create one for it if you like. The agent requires thatsystemctlis installed and usable.On the same server that your database (or other job types) instance is running, execute the provided command given to you via bakup.io, this will look like:

- After you have successfully installed an agent, this means you will have connected a server and it will now be able to communicate with bakup.io, you can now go and setup a database or file job and start backing up
Note: During automatic installation the process will compare hashes to make sure the correct binaries and files are downloaded and valid from bakup.io
Agent Permissions#
After you have successfully connected an agent, you will be able to see your server responding on the servers page. The agent uses (by default) the service user called bakupagent, you will have to make sure this user has the correct permissions when you setup a job.
Some situations you may need to consider when setting permissions:
- Local storage providers, make sure the
bakupagentservice user has permissions to access the directories you have told it to backup to, otherwise the agent will report an error at bakup.io - Make sure the agent has the correct read and write permissions in relation to the jobs it will be running, you may have to give it permissions or access via
chownorchmod - When backing up databases, make sure the
bakupagentuser has permission to run commands that are used to access and backup your database system
Manual Installation#
In the event that you would like to manually install the agent
Three configuration files must be created
Populate
USER_IDwith the ID of the user you wish bakup agent to run under (the installation script will create a service user calledbakupagent, this is recommended), then createCLIENT_IDandAPI_TOKENwith your Client ID and API Token, respectively.NOTE: Ensure that the
CLIENT_IDandAPI_TOKENfiles are writable by the user that will run the agentCopy the Bakup Agent and rclone binaries in to
/opt/bakupagent/.After making the binaries executable, you can start the agent -
./opt/bakupagent/bakupagentNOTE: The Bakup Agent can be run with the
-dargument to enable debug messages.
Directory Tree#
Dependencies#
If you have followed the steps for the automatic installation, you do not need to worry about installing the dependencies manually.
However, if you followed the manual installation steps, you will need to install:
opensslca-certificatessystemctllibcurl4-openssl-dev